Make your very own version of this iconic Halloween candy ~ homemade Candy Corn.
Sing it with now ... "It's the most wonderful time of the year. With the kids jingle belling and everyone telling you be of good cheer!" ... Oh, wait! Wrong time of the year.
So it may not be Christmas time, but it is the time of year when candy corn is everywhere. You can't turn around in a store without seeing a bagful of this iconic Fall candy.
But did you know you can make homemade Candy Corn? You sure can!
Now the next question you're probably thinking ... Is making homemade Candy Corn worth the effort?
My honest assessment and answer to that question is ~ Yes, it is worth it. Once or twice in your life. Or, as a fun Halloween/Fall project with the kids.
Plan to make homemade candy corn when you have a nice chunk of time to do it. It's not something to cram into a 30-minute block of time.
Making homemade candy corn is a tedious process ... but it's also fun.
As I described it to my husband, it's sort of like playing with edible Play-dough! Which to me, is relaxing. Just plan to make homemade Candy Corn when you have a nice chunk of time to do it. It's not something to cram into a 30-minute block of time.
What about taste?
Homemade candy corn tastes really good! In my opinion, it's better than the store-bought stuff ... with a bit more of a vanilla taste than its store-bought counterpart.
As for its look? With a bit of patience, it sure can look just like the stuff from the bag.
Making your very own homemade Candy Corn starts with cooking up a sugar-syrup based dough.
The dough is divided into three pieces and colored the traditional candy corn colors ... white, orange, and yellow.
I found it easiest to knead the food coloring into the dough with a dough scraper, but your hands work just fine too.
Worried about getting coloring on the counters? ~ Knead on top of a a piece of parchment paper lining a baking sheet or the counter.
The dough is divided into three pieces and colored the traditional candy corn colors ... white, orange, and yellow.
As for its look? With a bit of patience, it sure can look just like the stuff from the bag.
I found it easiest to knead the food coloring into the dough with a dough scraper, but your hands work just fine too.
Worried about getting coloring on the counters? ~ Knead on top of a a piece of parchment paper lining a baking sheet or the counter.
Once the dough is colored, it's time to form and cut the candy corn. There are two ways to go with this ...
The first method for forming and cutting homemade Candy Corn involves putting together a rope of each color into long tri-colored strips.
Then, use a pizza cutter of sharp chef's knife to cut the dough strip into triangles. Alternate cutting angled to the left and then angled to the right as you work down the strip.
This first method will create candy corn that has half of the candies following the traditional color pattern of a white tip, orange in the middle, and yellow at the wide end ... and half with the colors reversed.
Want to keep all of your candies following the traditional color pattern of a white tip?
Then use the second method for forming the homemade candy corn.
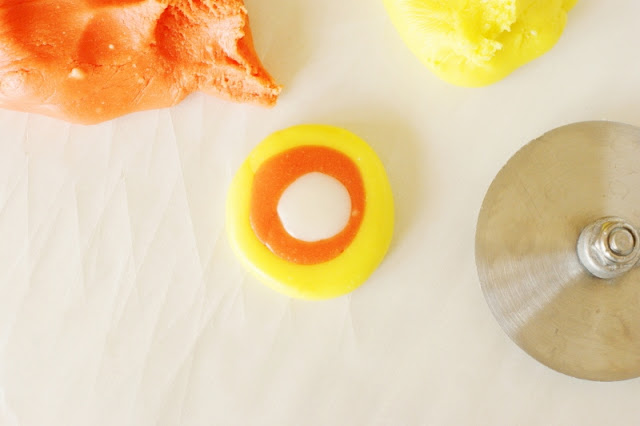
Make a small disc of white dough, and surround it with an orange and then a yellow strip to create a "bulls-eye." Use a pizza cutter or sharp chef's knife to cut the "bulls-eye" into eight pieces, pizza-style.
Works like a charm!
Once cut, place the cut candies on a parchment-lined baking sheet and allow to dry, uncovered, overnight.
How about red & green candy corn for Christmas?
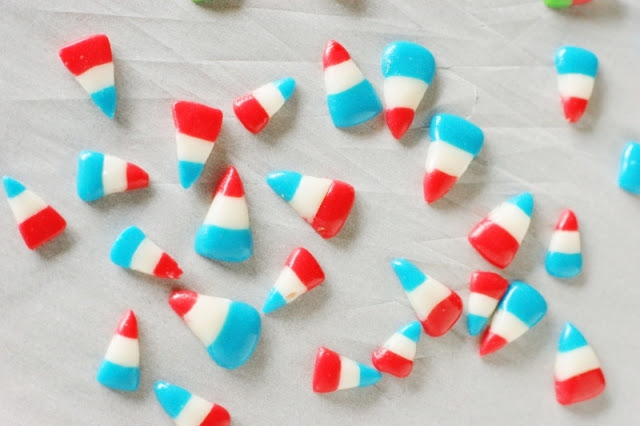
Or red, white, & blue candy corn for 4th of July? Why not?
I do have a word of caution about stickiness. Unlike the store-bought stuff, homemade candy corn ... even after it's dried ... stays sticky. Very sticky.
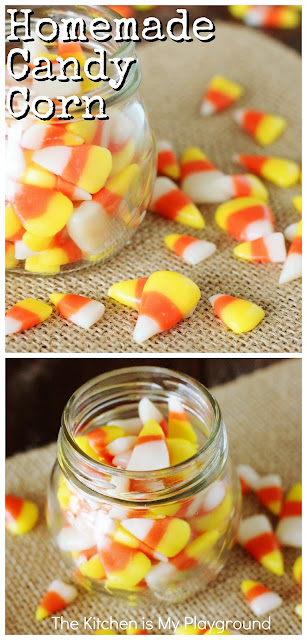
As in, after I piled the homemade candy corn into this little jar for a photo ...
... I ended up with clumped-together sticky lumps of candy corn mess.
But there is a solution. ~ Cornstarch.
Dusting the finished candy with cornstarch and tossing it gently to get all surfaces covered will take away the stickiness.
Cornstarch does dull the candy corn colors, but the colors will brighten back up the more and more the cornstarch works in.
So while homemade Candy Corn is indeed a tad tedious to make, it's a kitchen adventure worth experiencing at least once in your lifetime ... and an adventure I think older kids would love.
And how cool is it to say you've made your very own homemade version of this iconic candy?
Just do allow yourself a good chunk of time when you make it. And then relax away with your homemade candy corn adventure!
Check out these other classic candy treats:

Affiliate links are included in this post. I receive a small amount of compensation for anything purchased from these links,at Amazon.com at no additional cost to you.
- Martha Washington Candy
- Homemade Marshmallows
- Homemade Chocolate Marshmallows
- Peanut Butter Buckeyes
- Crunchy Buckeyes
- Homemade Andes Mints
- Easy Pretzel Kiss Candies
- Krispie Treats Lumps of Coal
- More cookie & candy recipes
Thank you for stopping by The Kitchen is My Playground. We'd love to have you back soon!
Yield: varies

Homemade Candy Corn
Make your very own version of this iconic Halloween candy.
prep time: 1 hourcook time: 10 Mtotal time: 1 H & 10 M
ingredients:
- 1 1/4 c. confectioners' sugar
- 2 1/2 T. nonfat dry milk
- 1/8 tsp. kosher salt
- 1/2 c. granulated sugar
- 1/3 c. light corn syrup
- 2 1/2 T. water
- 2 T. unsalted butter
- 1/2 tsp. vanilla extract
- yellow & red food coloring
- cornstarch {for dusting}
instructions:
How to cook Homemade Candy Corn
- Sift together confectioner's sugar, nonfat dry milk, and salt {sifting helps ensure there are no lumps in the finished candy}. Set aside.
- In a 2-quart saucepan over medium heat, combine granulated sugar, corn syrup, and water. Cook for about 3 to 4 minutes until sugar is dissolved. Stir in butter. Insert a candy thermometer and cook, without stirring, until the mixture reaches 240 degrees. {Watch the sugar syrup's temperature closely. Not reaching 240 degrees makes the dough too soft, while going over 240 degrees causes a dry grainy texture.}
- Remove from heat and stir in vanilla extract.
- Add dry ingredients to the sugar mixture. Stir with a firm silicone or plastic spatula until well combined. Pour mixture onto a parchment-lined jelly roll pan or baking sheet. Allow to stand until cool enough to handle, about 10 minutes.
- Divide dough into three equal pieces. Set aside one piece to remain white. Make a well in the center of each remaining piece. Place 5 drops of yellow food coloring in the well of one piece to make yellow dough. In the other, place 7 drops of yellow food coloring and 2 drops of red food coloring to make orange dough. Use your hands or a dough scraper to knead the yellow and orange dough pieces until uniform in color.
- To form candy corn, pinch off a small piece from each dough. With your hands, roll each into a rope about 1/4-inch to 1/2-inch thick. Lay the ropes side-by-side to form a strip with yellow on the bottom, orange in the middle, and white on top. Gently press ropes with your fingers so they stick together. Flatten the top of the pressed-together ropes by lightly rolling with a rolling pin, smoothing out the curved edges.
- Use a pizza cutter of sharp chef's knife to cut the dough strip into triangles. Alternate cutting angled to the left and then angled to the right as you work down the strip. Repeat rolling ropes and cutting with remaining dough.
- Lay cut candy corn on a parchment-lined baking pan in a single layer, separating to prevent sticking. Allow to dry uncovered overnight.
- To prevent sticking, once candy corn has dried over night lightly dust with cornstarch and gently rub onto the top surface of the corn with your fingers. Once the top surface is coated, gently toss corn with your fingers to coat all sides. {This will dull the colors but they'll brighten back up as the cornstarch works in.}
- Store in an airtight container.
Please enjoy these other Halloween treats from The Kitchen is My Playground ...
Affiliate links are included in this post. I receive a small amount of compensation for anything purchased from these links,at Amazon.com


I am sure your candy corn tastes better than store bought stuff, but it probably would take more time and work than I am willing to put in to it right now. My husband is the candy corn lover in our house and, as much as I adore him, he won't be getting any homemade candy corn from me(lol)! I think there are at least two different types(regular and chocolate) in his candy stash right now! He has such a sweet tooth.
ReplyDeleteMmmmm ... I love the chocolate candy corn. Maybe I'll have to figure out how to make that next! Thanks so much for stopping by, Lynn!
DeleteYou could try making the chocolate ones with molding chocolate or replacing the vanilla extract with chocolate extract.
DeleteAmazing recipe! So tickled you shared with us at Weekend Potluck. I'm sure this has to be very tasty...it's beautiful for sure. I'm especially fond of the patriotic corn.
ReplyDeleteI never knew how candy corn was made. Your instructions are so clear and understandable. Thanks for sharing this recipe. I may have to give this a try.
ReplyDeleteThank you for your kind words, Pattie! Give it a try ... it's quite fun!
DeleteVery clever!
ReplyDeleteThere are no words other than to say this is awesome! :)
ReplyDeleteToo much work and time for me but it is a brilliant idea! Love that you can mix and match colors.
ReplyDeleteThanks for the great idea! I'd love to give it a try! Thanks for linking up at the Handmade Hangout- I'll be featuring you on my blog (www.occasionallycrafty.com) today when the new linky goes live. I hope you'll stop by to check out your feature and link up again!
ReplyDeleteHave you tried or do you have suggestions on how to flavor the candy corn.
ReplyDeleteReplace the vanilla with another flavoring. (I realize the comment is from 2015, but in case someone else has the same question.)
DeletePretty amazing!
ReplyDeleteI love the colors you used to mix it up!
Really fun!
Thanks
Michelle
This looks amazing! Do you by chance know of a substitute for the non-fat dry milk in this recipe? Trying to make it dairy free. Thanks for your time!
ReplyDeleteThis isn't candy corn, it's just fondant, i mean it looks the part but... but candy corn taste way different...
ReplyDeletePlease share more like that. godis på nett
ReplyDeleteI love that you can switch out the colors for different holidays! Great idea!
ReplyDeleteWell who knew you could make this at home!! Don't tell me daughter she will be having me make this all the time!! She loves candy corn. I will pin it to surprise her! Thanks for linking up to #trafficjamweekend
ReplyDeleteBetter than America's Test Kitchen! What a great tutorial and featuring when my party opens up!
ReplyDeleteI am so impressed by this recipe and your talent in making them. I love candy corn and I am not sure if I will ever try out this recipe but I definitely think it is worth a feature. Thanks for sharing so many color ideas for it. #HomeMattersParty
ReplyDeleteThank you for hosting the linky party, we always enjoy linking with you!
Delete